Showing posts with label cooking. Show all posts

Apples: The Good, The Bad, and The Ugly

Apples

The Good, The Bad and The Ugly, that describes our apple trees.  We don't treat the trees with any kind of chemical sprays, or even organic sprays; we let nature decide.  The outcome?  Many are Good, meaning no bruises, spots, pest issues.  Some are Bad, meaning those are picked and put in the woods for the many animals that frequent our yard.  And there's the Ugly.  Some are ugly and edible, others are ugly and put out back.  This year, our 3rd year living here, happened to produce mostly Good and we couldn't be happier.

Apples: The Good, The Bad, and the Ugly

My usual course of action this time of year is to make applesauce and freeze it.  However, since we now have our own apple trees and a bounty of fresh apples, I felt it was high time I learned canning. Off I went to Pinterest and found more than enough recipes to get started, too many actually which is why I wound up making a Pinterest Board dedicated to apples.

I started with Food.com's Best Apple Pie Jam recipe.  It seemed simple enough and it was, we turned out about a dozen jars.  For the novice canner like myself, I highly recommend this one.  It also happens to taste delicious. The only change I made was instead of packed brown sugar, I use Sucanat. I've been using it in place of commercial brown sugar for years as a healthier option.

Sucanat

My next day included Canning Apple Pie Filling from Little House Living.  I found it fairly easy to follow and wound up making 5 Quarts plus 8-1/2 pints for holiday gifts.  Win-win!

Apples: The Good, The Bad, and the Ugly

After the Apple Pie Filling, I decided to try Homemade Pancake Syrup from the apple peelings. Since I'm not one to waste anything, this sounded like a great idea.  Let me just say, this would be better suited to a more experienced canner.  I read the directions carefully, however, one key factor was missing; the proper time for boiling.

After my failed attempt, I decided to read thru ALL the reader comments and found that I was supposed to boil the liquid for just a minute or two.  Since this important fact was left out of the directions, and I didn't know any better, I boiled the liquid for over 30 minutes.  If I had to be honest, I'd say it was probably 45!  Needless to say, it went downhill from there.

To make a long story short, I boiled over the liquid onto my ceramic top electric oven.  Not pretty, and not pretty to clean up either.  The outcome? Candy Apple Topping.  We grabbed a few Good Apples, literally wiped on the topping, and enjoyed a treat for the afternoon.

Apples: The Good, The Bad, and the Ugly

My last attempt, using additional leftover apple peelings was Apple Scrap Jelly from Fireflies & Mudpies. I'm happy to say, this was a huge success.  We did 9-1/2 pint jars for holiday gifts and will continue to make this throughout the season.  Note:  This recipe calls for 9 cups of sugar, I reduced that to 6 cups and it was wonderful and not too sweet.

Apples: The Good, The Bad, and the Ugly

All in all, canning has been a good experience and considering we have several more bushels to pick, we'll be in the Kitchen for the next couple of weeks.

Apples: The Good, The Bad, and the Ugly

Need ideas for your apples?  Check out our APPLE HARVEST Pinterest Board.
Over 600 pins for Breakfast, Lunch, Dinner and (adult) Crafts.

Also, be sure to sign up for email updates and receive our mini-eBook
Canning Made Easy.


Resources
RESOURCES

Our Pinterest Canning Board here
Our Apple Harvest Board here

Test jars for proper sealing here
Troubleshooting here

Questions about Water Bath Canning here

Questions about Pressure Canning here

Adjust for high altitudes here

National Center for Home Food Prep here


Thoughts from a newbie canner:
  1. It looks like alot in the pot, but it's not.
  2. I ran back to the store 3 times for jars.  Stock up ahead of time.
  3. Get the all the canning supplies recommended.  You'll use them all.  
  4. Always check the reader comments, it typically holds valuable information the writer omitted.
  5. If YOU are posting a recipe, read, read, read and read it again.  Make sure you have ALL necessary and pertinent information included.  Canning really is easy if you have the proper directions. 

Spinach Avocado Chicken Salad


Looking for a REALLY SIMPLE yet vibrant salad for dinner?  This is it!  No need to turn on the oven or stand outside over a hot grill (in 100-degree heat!).  


Ingredients

2 Tbl Coconut Oil
4 Chicken Breasts, cubed in bite size pieces
A handful of fresh herbs, chopped (about 4-5 Tablespoons)
1 Container Organic Spinach
1 Large and several small tomatoes (for variety and taste), cut into bite size pieces
1 Ripe Avocado, cut into bite size pieces
8oz Fresh Mozerella, cut into bite size pieces
1 fresh loaf of Bread

Directions

Melt Coconut Oil in pan and add cut chicken.  Add herbs and fry until chicken is cooked through.

Assemble Spinach, Tomatoes, Avocado, Chicken and Mozzarella. Let people top with their own dressing.  We like Balsamic Vinaigrette. 

That's it!  Super simple and only about 20 minutes from start to finish.

Personal Recipe Notes


1. I prefer to fry in Coconut Oil.  It's a healthy alternative to Vegetable Oil or even Olive Oil and gives you a fresh, clean taste.  Check out the benefits of Coconut Oil

2. I used tomatoes from our garden.  Use any tomatoes you like but the fresher they are, the fresher your salad will taste.

3. I also use Nature's Promise Chicken.  I prefer to use organic meats but it's not necessary.

4. I used my own herbs; Basil, Thai Basil, German Thyme and Parsley.  Use whatever herbs your taste buds desire. It's all about personal preference.

5. I use Nature's Promise Organic Balsamic Vinaigrette.  Use YOUR favorite dressing. I prefer an organic, fresh tasting dressing as heavier dressings will mask the taste of your salad.  Unless of course you ask my husband, who puts Thousand Island on everything.

6. Serve with soft, fresh bread.

This is one of the most easily adaptable recipes you'll have in your arsenal.  If you're a die hard griller, go ahead and first marinate your chicken for up to an hour, then grill as you normally would. Finally, add any other vegetables you like (cooked or raw) - the more the merrier in my opinion.

Enjoy!


Don't forget to compost your scraps.  It's easy!

Super Simple Mint Iced Tea and Why You Should Drink It


Let's start off with the good stuff - the Super Simple Mint Iced Tea recipe!

5 cups fresh picked Mint (more or less depending on how light or strong you like it)
1 cup Sugar (again, more or less depending on how sweet you want it)
1 gallon water

Bring water to a boil then stir in sugar until completely dissolved.
Add Mint leaves and softly boil for 15-20 minutes.
Drain in colander.
Cool and put in pitcher or enjoy it hot!

That's it!!

Want to dress it up?  Freeze mint with water in ice cube trays or freeze Lemon and Mint or Lime and Mint.

Looking for a twist?  Try some of these combinations;

Ginger Mint Tumeric Tea
Ginger Mint Tea
Green Tea, Bubbles, Lemon and Mint                                                           
Sweet Honey Mint Green Tea
Honey Mint Green Iced Tea
Moroccan Mint Tea
Mint Lime Tea Cooler
Matcha Mint Iced Tea
Apple Ginger Mint Iced Tea
Lemon Mint Iced Tea
Chamomile Lavender Mint Iced Tea
Mint and Lime Sweet Tea

Want to grow your own Mint?  Check out these Do's and Dont's!  Be wary though, Mint is like a weed, it will spread and grow uncontrollably and take over your planting bed.  Be sure you have an enclosed planting bed or plant in a large pot.

Now, WHY should you drink Mint Tea?  Oh so, so many reasons!

Organic Facts has a great list with explanations for use as a Fever Reducer, Nausea and Vomiting, Respiratory Issues, Immune System, Bad Breath, Weight Loss and Stress Reducer.

Medical News Today notes the use of Mint for Relief from Allergies, Common Colds, Indigestion, IBS and Skin reactions.

Livestrong adds Stomach Upset, Mental Focus and Coughs and Congestion.

Of course, if you are using Mint for medicinal purposes, be sure to research side effects and check with your doctor before starting any self-medicating.

If you're curious about the history of Mint, check out this post from Our Herb Garden.  It's quite interesting and informative.


So there you have it; a Super Simple Recipe, a dozen more recipes ideas, Advice on Growing Mint, The Benefits of Mint and the History of Mint. Now it's time to enjoy your own Homemade Mint Tea, Hot or Cold!


150+ Homemade Dog Food Recipes

If you read last week's post, 60+ Fruits and Vegetables for Dogs , you know I'm big on healthy eating for our dogs.  I previously hadn't given a lot of thought to making my own food, I was quite happy with the raw treats and adding to their kibble , however, when our older dog contracted Lyme Disease and then diagnosed with Thyroid Disease, I felt I should make the change.  I'm glad I did, and so are Oscar and Macy!

I spent literally hours searching and reading sites for recipes I would make myself and therefore feel comfortable recommending to you.  Of course, check with your veterinarian before you make any dietary changes.  I am not a medical professional, just a Doggie Mom who loves and wants the best for her family, all of them.

Money Crashers, yes, not a website name you would associate with Dog Food recipes BUT, there are 10 healthy, simple recipes for meals and treats.

Life in the Hundred Acre Woods lists just one recipe but it's a good one!  It's prepared in the crockpot, can't get much easier than that.

Munchkins & The Military has 3 recipes; (1) 2-ingredient, (1) 3-ingredient and (1) Bacon Cheddar.  They seem straight forward and easy to prepare.

Skinny Ms. has a very low cost, nutrient packed recipe for the crockpot.

Dog Treat Kitchen is a comprehensive site with over 100 recipes including biscuits, cakes and meals.  There is plenty of great information you can tailor to your dog's needs.  She also offers a FREE ebook by signing up for the Newsletter.  This is one to bookmark!

Food.com offers just one recipe which looks the easiest to make from what I've seen so far.

Gourmet Sleuth has a lengthy, informative post including a basic recipe and 6 additional recipes.  The owner of this site is also has a degree in Foods and Nutrition.

Amazon offers over 30 FREE recipe eBooks for Kindle Unlimited Users.  The average non-Kindle user cost is $2.99.

You can get a FREE ebook, "21 Delicious Dog Food Recipes" from BreedingBusiness.com just for signing up.

Now that you have plenty of sites to check out, read and decipher what you like, you're asking "How much do I feed Fido?!"  There is no standard amount (i.e. 1/2 cup, 2 cups, etc.).  Just like us, it all depends on the size, age and activity level.  If your dog has medical issues, that will change the amount (and most likely the ingredients) as well.

I found Fido Savvy to be quite informative and they tell you how to calculate what your dog needs (it looks complicated but it's not).  They include puppies, pregnant/nursing, seniors, overweight, active/working dogs.

After all this reading, I've learned a key factor in feeding is calorie intake.  My suggestion would be this:
  • Choose several recipes you want to create and make a master list of the ingredients.  Remember, most recipes are similar so the ingredient list should be fairly short.  
  • Look up the calories per serving for the ingredient and note that on the master list.  Add to the list as you add to your recipe repertoire.  
  • Back on the recipe pages, write down the total calories for that recipe.  
It sounds like a hassle but realize you only do this once for each recipe and then you have it forever.  You can also take the recipe pages to your Vet for confirmation.

Of course if this is your first venture into Homemade Dog Food it will be time consuming to get started but don't let that deter you.  Starting is always the hardest part in anything we do.  Once you get your feet wet, you'll realize how very easy this is and how happy and healthy your pets are.

**There are plenty more sites you can find by Googling Homemade Dog Food.  I didn't include more here because I felt they were either (1) Too lengthy and thereby confusing (2) poorly written (3) didn't offer any real pertinent information another site didn't already have or (4) it was just plain repetitive.


STOP Boiling Over!

Some time ago I stumbled across a Kitchen tip that has become one of my most valuable bits of kitchen knowledge.  It may sound too simple, unbelievable and possibly a down right lie BUT I can assure you it works EVERY TIME!


The ONLY gadget you will need is a wooden spoon that can sit comfortably atop your pot. Put it on when you start cooking (before boiling, works best). Yep, that's it! I can honestly say I have no idea WHY this works, but it does, every time.  I will say, I have an electric stove (although I REALLY REALLY miss gas stoves!).  If you have a gas stove, I would love your feedback on this method.

One Last Bowl of Cherries

2.5 QT Crockpot
The squirrels tried to beat us but we prevailed!  We picked one more big bowl of cherries.  Considering it's over 80 degrees outside, I didn't feel much like turning on the oven which prompted an intense internet search for a crockpot recipe.

Sounds easy, right?  Wrong!  Nearly every recipe I came across called for cherry pie filling.  Can you say yuck?  I'm not really a "pie filling from a can, filled with preservatives, excessive sugar and fillers" kind of girl - can anyone say cherry slime?!

I'm not kidding when I tell you it took some real digging to find a recipe where I could use FRESH CHERRIES!  Luckily, I came across The Crockpot Gourmet.  I did not know this Blog but after some browsing around, I bookmarked it and found them on Facebook.


The recipe is simple...

  • 16 oz frozen sliced peaches
  • 12 oz frozen sweet cherries (pitted)


  • For the filling:
  • ¼ cup greek yogurt
  • ½ cup all purpose flour
  • ¼ cup sugar
  • 3 tablespoons milk
  • 1 tablespoon lemon juice


  • For the topping:
  • 6 tablespoons cold butter
  • ½ cup wheat flour (or regular flour is fine too, I just like the extra texture of the wheat flour)
  • ¼ cup brown sugar
  • ¼ cup sugar
  • ½ teaspoon cinnamon
Instructions
  1. In a small bowl whisk together the filling ingredients until well combined
  2. Add peaches and cherries and toss to coat
  3. Spray crock with nonstick spray and pour filling into crock
  4. Using a sharp knife cut up the butter into tiny pieces trying not to touch with your hands
  5. Then using a large fork add in remaining topping ingredients and use fork to cut it all in to form a crumble topping (or if you have a pastry cutter then you can just to this all at once)
  6. When the butter is pretty well broken up and combined (don't worry if it's not perfect) then sprinkle evenly over the top of the filling in crock
  7. Cover and cook on high for 2-4 hours
Notes
I used a 3.5 quart oval crock

The only changes I made were (1) I used our fresh Cherries and a bag of Frozen Mango and (2) I didn't make the topping but only because I just made Strawberry Pie and Cherry Pie. My plan for this is as an ice cream topper.

Cherries From Our Yard

We moved here just about 3 years ago and found the property to have so many features we love including multiple fruit trees!  We have 2 Apple, 2 Cherry and 2 Peach.  The house had been vacant for about a year so the animals had the run of the place, literally! Our first two summers didn't yield really anything since the squirrels, birds and bears got it all first.

Now on our third summer, we are fully ingrained and the animals have subsided a bit (there's no controlling the bears!) AND we've been able to pick two full bowls of ripe, delicious cherries!

Now I just needed to figure out what to make with them!  Remember, I'm also in the midst of two full baskets of Strawberries!
Fortunately I found a great recipe in my favorite cookbook, Simply in Season.  This is my go-to book, even before the internet, for easy to prepare, healthy ingredient recipes.  My next hurtle was pitting all those cherries!  My research paid off, I found a simple, free, way to do it easily.  Simply take a hard, plastic straw, push it through and out pops the pit!  Honestly, I had this done in about 30 minutes.


I even had enough cherries left over to make and freeze a filling batch.  Following the recipe below, I chose to cook the fruits.


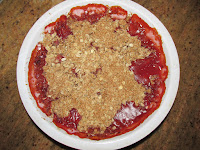
1 1/2 Cups each of four fruits: raspberries, blueberries, blackberries, marionberries, boysenberries, huckleberries, saskatoons, mulberries, strawberies, sour cherries, peaches, apples


Mix together and pour into a 10-inch deep dish pie pan. Alternatively, the fruits can be cooked with 1/4 cup water, 1/4-1/2 cup sugar (depending on the sweetnesss of the fruit) and 2 TB cornstarch to thicken before baking.


3/4 cup flour3/4 cup rolled oats3 TB butter2 TB oil34/ cup brown sugar1/3 cup nuts , chopped; optional


Mix until crumbly. Evenly sprinkle topping over fruit.
Bake in preheated oven at 375F until fruit bubbles and topis golden brown, about 30 minutes; may take longer if using frozen fruit.


I had cherries and peaches on hand for this recipe.
For the additional batch of filling I froze for later, I used
the remaining cherries and frozen blueberries.
Enjoy!
What's cuter than a puppy and
a bowl of cherries?
Well nothing, of course!

So Many Strawberries

My neighbor and I went strawberry picking at the Sussex Country Strawberry Farm. An annual event which yields TONS of ripe, delicious strawberries! They even have some great recipes on their website.  You can also follow them on Facebook.

My plan for the berries, so far, is freezer jam, bread and a pie. I like to make several breads and freeze them and then as much jam as I can with the leftovers.


As far as the jam, I'm not a 'canner'.  Trying the traditional method of canning turned out to be a disaster and a WHOLE LOT of wasted berries, hence the practice of freezer jam was learned!  And honestly, it's a quarter of the time spent and I successfully freeze all kinds of jams for at least a year.


Let me say, I love my house.  This is our 4th house (in 27 years) and by far the best!  It has plenty of DIY projects needed that will happen eventually and 3 acres of privacy, but since it's now summer, basically all of my free time will be spent in the Kitchen.  This is the only downfall of my dream house. Being a cook-from-scratch and bake-from-scratch Homesteader, I envy all those big, beautiful Kitchens all over the internet. The actual work space in my kitchen is in a 10x10 area with about 6 feet of working space.  Not ideal, but I make it work!

So, without further adieu.. here's everything I need to make some pretty awesome Strawberry Breads..


I used the recipe from Simply in Season, my favorite summer cookbook.

Ingredients
• 1 cup flour                                         
• 1 1/4 cups strawberries (mashed)      
• 2/3 cup oil                                         
• 2 teaspoons ground cinnamon             
• 1/2 teaspoon baking soda
Directions
Mix together in a large bowl, stirring until just combined. Pour into greased 8-inch loaf pan and bake in preheated oven at 350F  until toothpick inserted in center comes out clean, 1 hour.

• 1/2 cup / 125 ml whole wheat flour 
• 3/4 cup / 175 ml sugar 
• 2 eggs 
• 1/2 teaspoon salt 
**Changes I made;  I used 1.5 cups freshly milled flour and added a Tablespoon of ground flax


I used one full box to make 3 breads and 1 pie
and strawberry water.


I definitely take the easy way out in making jam.  Strawberries, sugar and Instant Pectin, that's it.

Follow the directions on the Pectin container, let it sit 30 minutes,
then refrigerate or freeze.

My son and I  crushed one full box and prepared all this in less than an hour! And if we're talking dollars and sense, it's about $4 per pint.  Not bad considering limited ingredient, organic jam will run you around $4 per half pint!


I am a Homesteader...and I live in Suburban New Jersey

Anniversary weekend at
1922 Starkey House in upstate NY
I have to say, I never thought of my self as a "Homesteader". Images of run down shacks on the outskirts of Alaska come to mind when I hear of homesteading. However, the more I learn about it, the more I come to realize this has been our way of life for nearly 20 years!

Being married over 25 years to an avid hunter, gardener, composter, landscaper and outdoorsman (to name just a few) has taught me alot. It was my stepping stone, WAY BACK in 1988, to a life of homesteading. A life I didn't realize I would become a part of and love every minute of it!

We're just a regular Suburban family. We live in a beautiful town in a beautiful 3 acre home filled with DIY projects, surrounded by awesome neighbors (no, they are not 20 miles away lol) and yes, the grocery store is 10 minutes away and a huge mall is just 20 minutes down Route 15! To look at us you'd think we were just like everyone else.

But we're not.

High School Sweethearts
25+ years later
We exclusively eat venison (no chemically processed beef for us!), have gardens, grind flour, bake from scratch, DIY, use only what we need, recycle manically, shop Farmer's Markets and Trader Joe's as much as we can.  Now Trader Joe's IS at least 40 minutes from here but so worth the trip AND I get to visit my sister! 

We are not crushed by debt but live by our means and do without when necessary.  We've had some really GREAT times and some really AWFUL ones too.

We have three beautiful sons who are learning right along with us but still have complete freedom to become their own persons (One would be considered a Hipster, one is an artist and one is a total techie nut). We've been called hippies, crunchy, even bitchy (I can get on a tangent about healthy eating).

We've essentially cured asthma and gastritis through nutrition. By essentially I mean no more pneumonia episodes or nebulizers. No day and night pills for gastritis. Not one of us has had the flu in years. In fact, we RARELY get sick at all. All through changes in our nutrition habits.

My Beautiful Boys


I hope you find this Blog interesting and helpful. I'm happy to answer questions if I can. Remember, Google search is your friend.  Talk to your local farmers, they are a wealth of information.  Seek out like-minded people to get yourself started or continue your journey. 

You will never know it all....E-V-E-R-Y D-A-Y is an opportunity to learn something new!

Grinding Your Own Flour

Okay, that title might scare you – DON’T LET IT!!  I’m sure you have images of sitting on a low, wooden stool, a big wooden bucket full of grain between your legs and a giant wooden spoon.  Then you’ll spend the next 12 hours mashing it into flour.  Perhaps if we were back in the 1800’s but this is the new millennium!  No more stools, wooden spoons or hours of back-breaking time in the barn!

Personally I use the NutriMill Grain Mill because it came highly recommended and at the time I was a novice taking a leap of faith. Yes, it’s expensive (the average cost being around $250) BUT the health benefits of grinding your own grain far outweigh the initial cost.  

As of this post, I have had my mill nearly 10 years, that’s just $25 per year and each year that number goes down. Did you know, there are over 60 different nutritional properties in a SINGLE GRAIN!  Among these properties are essential oils.  In commercial grain, ALL the properties of the grain are stripped, washed, bleached and then only certain properties are added back in (hence, “enriched flour”).  

Did you catch the word BLEACH?  Yes, flour is NOT white.  Commercial flour is white because of bleaching. Now if we’re talking organic flours, yes, they are MUCH better than your store-brand or name-brand commercial flours but they DO NOT have the essential oils or nearly ALL the original nutrition.  If they did, they would turn rancid on the shelf long before you ever bought them. 

Remember, commercial flour is ground, treated (either commercial or commercial-organic), packaged, stored, shipped, stored at grocery store, then put on the shelf.  And if it’s not made here in the USA, you can double that time frame.  Yuck! 

Do your research!  There are many different types of grain for different cooking and/or baking applications.  Personally I use Organic “Soft-White” because it’s the most universal.  I also like the ancient grain Kamut because it has a slight nutty flavor. Did you know, Kamut is considered an ancient grain.  It had once been found in an Egyptian tomb dating back 5,000 YEARS and was still in perfect condition!  Grains won’t ever go bad if stored properly.  I store my grain in 5 gallon food grade buckets with tight fitting lids I purchased at Lowe's for about $6.

Where can you get grain?  Just about anywhere nowadays!  I buy mine online because I purchase large quantities. Recently I purchased a 50lb bag of organic Soft-White for $70 shipped.  That’s barely $1.50 per pound!  Organic flour will run you upwards of $5 per pound!  I grind about 3 pounds and store it in the freezer.  If you want it ULTRA-HEALTHY, grind only what you need and use it right away.  Freezing the flour will cause some nutritional loss but still by far outweighs buying commercial flour.

So, how do we make flour?  Well, get ready.  Take out your Nutrimill  (or whatever grain mill you purchase), put the grain in the top, turn the dial. Now walk away for a couple minutes (the machine is LOUD!).  Come back to fresh flour in the bucket.  Wait, that didn’t take HOURS of backbreaking labor!  That took just 3-5 minutes!  Whew, better go rest now…