2016 Dirty Dozen & Clean 15


Every year the Environmental Working Group publishes their list of the 12 'Dirtiest' and 15 'Cleanest' fruits and vegetables grown in today's market.  Strawberries top the list this year as the dirtiest fruit, putting Apples now in second place.


They cite strawberries, a whopping 98% of them tested, had detectable pesticide residue with 40% containing 10 or more pesticides and some having upwards of 17 different pesticides. Some are considered benign but others are linked to cancer, reproductive damage, developmental damage, hormone disruptions and neurological problems.  You can read their full findings here.

The saddest outcome of these findings is none of the pesticides found are against any laws or regulations governing our food production.  Shame on you America!

Unfortunately, eating 100% organic is sadly not part of most people's budget (certainly not mine). However, allowing for organic fruits and vegetables in accordance with these guidelines should top your list and be factored into your food budgets.  The higher cost of organic food far outweighs the benefits of saving a few dollars.

How can you buy organic on a budget?  I've found that buying frozen organic vegetables are only 30 cents more per bag where we shop and actually cheaper when they are on sale.  Plus, they are frozen immediately after picking which means they also have the highest nutrition content.  I typically won't buy open bin vegetables, even organic.  Have you ever seen someone touching every piece to find just the right one?  No thanks, you can keep your germs.  I am a bit neurotic about that.

Visit Farmer's Markets in your area.  You have the opportunity to talk directly to the farmer about their growing practices.  If it's not an organic farmer, ask if they are 'no spray'.  You may not know how expensive it actually is to be an organic farmer.  Not only are the materials more costly, but the government issues so many permit, classification, etc. fees on these farmer's, they literally can't afford to be labeled organic.  Many follow organic practices but chose not to get the certifications for this very reason.

Visit Farms directly.  Often they have produce stands or their own market where prices might be a little lower.  They also tend to put out bushels of fruits and/or vegetables that are getting past their prime.  Making applesauce? How does an entire bushel of Apples for $5 sound to you?  If you are into canning, these are wonderful finds!

Finally, search the internet for coupons.  Organic food coupons are not in abundance, that's for sure, but you can find them on occasion.

My bottom line...do what you can.  That's how we do it.

Click on photo to enlarge and print


Growing in the Shade


Not everyone is blessed with open space, plenty of sunlight and perfect soil.  If you're one of the 'unlucky' ones but still yearn to have a robust garden, this post is for you.

Let's start off with the soil.  In our nearly 30 years of gardening, we have never tested the soil. Perhaps that was to our determent but I don't believe so.  Our gardens typically produce well without any intervention except the following;
  • Properly till the garden area with either a shovel, pitch fork or rototiller.  You want the soil to be loose so plant roots have the freedom to take hold and prosper. Not everyone believes in tilling, but we found it to not only be beneficial but makes planting easier.
  • Adding leaves in the Fall.  They will break down over the winter and be ready to till into the soil in the Spring.  Gardener's Supply Company explains "Leaves are packed with trace minerals that trees draw up from deep in the soil.  When added to your garden, leaves feed earthworms and beneficial microbes.  They lighten heavy soils and help sandy soils retain moisture".
  • Compost.  We compost year round.  It's either put into the compost pile or directly into the garden.
  • Rotate plants every year or every other year.  Wikipedia puts it very simply; "Crop rotation is the practive of growing a series of dissimilar or different types of crops in the same area in sequenced seasons.  It help in reducing soil erosion and increases soil fertility and crop yield."  What the means is don't put your tomato plants in the same place every year.  Change it up and reap the benefits.
  • Our best weed fighter is grass!  Take your clippings and put them right in the garden. We pile it up in between the rows.  Be sure NOT to directly cover any plants, it will kill them. Another bonus, you're adding nutrients that can be tilled into the soil every year. I would however caution you, if you use chemicals on your grass, don't use it in your garden.  If your goal is growing heirloom or organic fruits and vegetables, then adding chemically treated grass will defeat your efforts.


Let's talk about shade and determining what you have and will be able to grow.  Penn State Extension has a guidance on determining your specific conditions.  Here are the basics:
  • Heavy shade; no direct sunlight reaches the ground (such as under dense evergreen trees).
  • Moderate shade; mostly reflected light (such as a typical hardwood forest).
  • Light shade; there is partially filtered sun (such as under birch trees).
Finally, you will need to determine just what type of shade you have; Heavy, Moderate or Light. Take a few days to note where the sun reaches and for how long.  Once you have an area chosen and determine how many hours of sun vs. shade it gets, you're ready to plant.  ALWAYS keep in mind, gardens are temperamental, not everything grows when or how it's supposed to.  Most successful gardens go through several years of experimentation.


I agree, you don't have a whole lot of options when dealing with shade, but you do have some and that's always better than none.

If you'd like to research more before diving in, check out these additional, informative posts.

Mother Earth News:  40 Gardening Tips to Maximize Your Garden
Smiling Gardener:  Checklist for Growing Nutrient-Dense Organic Food
Penn State Extention:  Vegetable Planting and Transplanting Guide
Planet Natural:  Vegetable Gardening Tips and Tricks
Gardener's Supply Company:  Vegetable Gardening for Beginners


Now that you've harvested your garden, it's time to enjoy!  There are a wide variety of recipes on our Pinterest Boards; choose the right one for you.


DIY Outdoor Games - Go Have Some Fun!


Spring is at our doorstep and Summer is not far behind.  Soon we'll be spending more time outside with friends and family.  What better way to enjoy that time together than outdoor games?  How about your favorite childhood games GIANT sized!   DIYing your outdoor games also gives you the freedom to personalize and use quality, lasting materials.  We all know, most outdoor games are made of flimsy plastic that won't hold up for more than a few seasons.  

HERE you can find pins for more than 70 DIY games, from simple to extreme. 

Ever wonder WHEN these games we play today were originated?  I did, which led me to some research.

Cornhole. The history of the game is mostly unknown.  One story claims the game was first played during the 14th century in Germany, then rediscovered in the hills of Kentucky.  The game is generally considered to have originated in America on the west side of Cincinnati.

Pick-up Sticks.  The date when Pick Up sticks was invented is unclear, but it has been traced back to the Native Americans, who played it with straws of wheat and passed it on to English settlers back when the United States was still known as the "the 13 colonies".

Checkers. The history of checkers can be traced back to an archeological dig in the ancient city of Ur in southern Mesopotamia, which is now Iraq, carbon dated 3000 B.C.  No one knows the exact rules from that time.  A similar 5x5 board, call Alquerque, is known to have existed in ancient Egypt as far back as 1400 B.C..

Plinko.  The most popular pricing game on The Price is Right, Executive Producer Frank Wayne debuted the game on January 3, 1983.  It's name came from the "plink" sound as the chips came down the board.

Angry Birds.  This franchise was created by Finnish computer game developer Rovio Entertainment and released in 2009 and has been downloaded more than 3 BILLION times!

Hopscotch.  The earliest recorded reference was in 1677.  In 1707, the game was titled 'Scotch-Hoopers' by Poor Robin's Almanac and was an all boys' game.  Other names include 'Scotch Hobby', 'Hop-Score', 'Peevers', 'Pabats' and 'Stapu'.

Tetherball.  Invented in England about 1880, it was initially played with a tennis ball and racquet and referred to as 'tether tennis'.  By 1912,  it was changed to use just your hands but still using a tennis ball.  Some time between then and the early 1950's the game was changed again to just a rubber ball on a rope and your hands.

Irish Bowling.  Tracing back to the 1600s, one story tells of Dutch soldiers bringing it to Ireland in 1689.  In 1969, the first international championship was played in the Netherlands and continues today.

Ring Toss.  Dating back to the late 12th and early 13th centuries in England, there have been many variations and names for Ring Toss including Wallhooky, Hook and Ring and BiminiRing.

Yahtzee.  Invented by a Canadian couple in 1956 as "Yacht Game".  They approached Edwin Lowe, who made his fortune with Bingo in the 1920s who then purchased the rights and renamed it 'Yahtzee".

Tic-Tac-Toe.  As early as the first century B.C., the Roman Empire called it Terni Lapilli where players had only three pieces to move around.  Chalked grid markings for the game have been found all around Rome.  Different names have included "Noughts and crosses" and "Tit-tat-toe". 1884 was the first print reference calling it "Tick-tack-toe".

Scrabble.  In 1938, Alfred Butts, an American architect, created the game based on an earlier version of his game Lexiko.  His new invention, which he called "Criss-Crosswords" added the 15x15 board and crossword-style play.  He created a few games but couldn't find a manufacturer until 1948 when James Brunot bought the rights and royalties for every unit sold. Brunot made a few simple changes to the original but it wasn't until 1952 when the president of Macy's played the game and wanted it sold in his store that it took off.  Over the next 30 years, the game changed hands several times and finally landed with Hasbro in 1986.  Today, Scrabble is sold in 121 countries in 29 languages with over 150 millions sets sold worldwide.

Bowling.  Artifacts dating back to 3200 B.C. were found in Ancient Egypt and the Ancient Roman Empire.  Balls were made from husks of grain covered in leather and held together with string.

Jenga.  Created by Leslie Scott in the 1970s and launched in 1983.  To date, over 50 million games have been sold worldwide.

Kubb or Kobb.  Kubb first appears in 1911 in a Swedish Encyclopedia and called "Skittles War". The first commercial sets were manufactured in the late 1980s.  In December 2011, Wisconsin declared itself to be the "Kubb Capital of North America" where the US National Kubb Championships have been held since 2007.

Connect Four.  It is believed Connect Four has it's roots in Tic-Tac-Toe and popularized in 1974 by Milton Bradley.

Kerplunk.  Ideal Toy Company introduced Kerplunk in 1967 and although it gets low ratings on game sites, is still sold today for upwards of $15.

Scavenger Hunt.  Markus Montola, a noted game scholar, theorizes scavenger hunts derived from ancient folk games.  In the early 1930s, gossip columnist Elsa Maxwell popularized the game through parties.


*Research via Google, Wikipedia and various game and historical sites.

Dessert....the best part of the meal


Easter is just around the corner which means we're busy planning our day filled with faith, family and fun.  If you're like me, dessert is the best part of the meal!  

Healthy desserts can be full of flavor and not full of fat and artificial ingredients.  Most recipes here fit that description and, of course, you always have the option to substitute.  For example, when a recipe calls for Brown Sugar, I substitute Sucanat.  If it calls for butter or oil, most times I can substitute applesauce.

This substitution list from Greatlist lists 83 healthy substitutions.  They also have an infographic if you prefer a visual reference.

So, dig in the Pins!  There's nearly 200 to choose from on my Desserts on the Homestead page. 


Homemade Bourbon Vanilla Extract


If you're a fan of Vanilla Extract, you're a fan of this post!  We all know how expensive PURE vanilla extract is in stores.  I'm not talking about the little $1.99 bottle of imitation flavored extract, I'm talking about that $6.99 and up of REAL extract.

Forget about paying those prices anymore.  Do yourself a favor and make your own like I have for years now.  Here's what you need....ready....concentrate......


  • (5) Gourmet Madagascar Bourbon Vanilla Beans (whole)
  • Any decent Vodka
  • Glass bottle with tight fitting lid


Whew, did you get all that?  All kidding aside, you really only need those two ingredients.  It really is that simple. I buy my beans from Beanilla (not an affiliate link).  I like the quality, pricing, and free shipping.  Of course, you may find them at local health food stores or cheaper elsewhere online but be careful, you don't want subpar beans.

Here's what do to....

Split beans lengthwise, leaving the seeds.  Put it in the bottle.  If whole bean is too long, simply cut it to size.  Then fill with vodka.  That's it!

If this is your first time making it, store the bottle in a cool, dark place (like the pantry or cabinet) for 4-6 months.  Give it a little shake when you notice it sitting there.  There's no rule of thumb, just a shake here and there.  And yes, it's a long time to wait but once you've started the extract, you won't have to wait as long next time.

When it's about half empty, simply add more vodka and wait a couple of weeks before using it. There's no need to replace the beans, they will continue to produce flavor for up to 7 YEARS! That's not a typo, I did type 7 YEARS.

If you use a lot of extract, simply start two bottles and rotate them. 

So let's compare.  I'm using the pricing from Banilla for comparisons.

  • A 16oz bottle of real vanilla extract is $44.95 from Banilla.  A true gourmet extract will easiily run you in that price range.  But remember, when it's gone, it's gone.
  • Purchasing 5 whole beans is $9.95 plus another $15 for a 1.75-litre vodka (depending where you live) and if you have to buy the bottle, let's add another $5 for a total of $30 initial investment.  Keep in mind the beans will last up to 7 years, the bottle lasts forever and if you only use that bottle of vodka for the extract, that 1.75-litre will make 5, 12oz bottles.  Bottom line: 5 bottles of extract will cost you about $5 per 12oz bottle (beans & vodka) for pure, gourmet extract.
  • Banilla also sells a starter kit for $18.95 but does not include the vodka so add a few more dollars.
  • If you have a HomeGoods store near you, they also sell starter kits for around $13 but I can't attest to the quality of the beans or how long they've already been sitting.


Bottom line....making your own will not only have superior taste, it's also cost effective AND you know EXACTLY what is in it.  


Granola Simplified


Love granola?  I do!  It is probably the fastest, easiest, healthiest snack you can make at a fraction of store prices right in your own Kitchen!


It really is that simple; rolled oats and brown sugar (I personally use Sucanat) or local honey, accompanied by ANY filler you choose.  The benefits of granola include fiber, may help to control blood sugar and lower bad cholesterol.  You feel fuller which means you'll eat less calories throughout the day and have more energy. 


Base Ingredients & Fillers

There are just THREE ingredients for your granola base; Rolled Oats, Honey, Butter.  That's it.  Of course, you don't need to add fillers, you can enjoy just the base too!  We like to add fun combinations of fillers and some added grains to boost the health benefits.


Base Recipe:

1 stick Butter combined with 1/2 cup Honey.  Over low heat, melt the butter completely, stirring often, then add the honey until it's a loose consistency.  Honestly, this takes about 2 minutes.


Pour butter/honey mixture over 2 cups uncooked Rolled Oats and thoroughly combine.  (Gently toss together until it all looks coated.) using a 9x12 casserole dish for baking.


Bake at 350 degrees for a minimum of 15 minutes.  Remove from oven, stir thoroughly, then bake another 5 minutes.  You can continue to bake longer if you want to brown it up for a crisper granola. 

Fresh from the Oven


Remove from oven and let cool.  Every so often (there's no rule), stir the granola to keep it loose and expedite cooling.  You can also transfer it to a cookie sheet to cool even faster, just be sure it has a 1/2" or higher side so it doesn't spill while stirring.


That's it!  That's the basic granola recipe.  No added harmful fillers or sugars! YOU know every ingredient you're eating.  That's reason enough for me.


If you want to jazz it up:

Add to the dry granola (before mixing in the hot butter mixture);
  • 1 cup coconut, 1/2 cup ground Flax, 1/8 cup Chia Seed and 1 cup Cranberries (or any dried fruit)
  • 1 cup coconut, 1 cup chocolate chips
  • 1 cup nuts (your choice), 1 cup chocolate, 1 cup coconut
  • 1 cup coconut, 1 cup dried fruit (your choice)
  • .....the possibilities are endless!


Yogurt, Granola, Apple
Ways to enjoy granola:

  • Have it plain
  • Yogurt Topping
  • Yogurt Topping plus any fresh fruit such as apple, banana, mango, peaches, pears, etc.
  • Mix together (or layer) Yogurt, Homemade jams and Granola
  • Slice Bananas, top with Peanut Butter, finish with Granola
  • Ice Cream Topping
  • Add milk, warm, and enjoy as a hot cereal
  • or don't warm and enjoy as a cold cereal
  • Layer yogurt, granola, fruit like a parfait
  • Bake into cookies, breads or muffins
  • Bake on to muffins for topping
  • Add to salads
  • Mix in nuts
  • ...Google "Ways to Enjoy Granola" and tons of great suggestions will pop up


The beauty of granola is you can add ANY DRY INGREDIENT to this recipe. For example, I always add flax and chia to any combination I bake.  I like the health benefits.  If you need more ideas than above, simply read the boxes of granola bars in the store for combination ideas!

*Note:  My favorite uncooked oats are Bob's Red Mill or Trader Joe's. My favorite honey is always from a local farmer for the highest medicinal benefits.  I always buy Stonyfield Organic Yogurt.  I always add Flax and Chia seed for additional health benefits and often add to that coconut and sunflower seeds.

Download a printable PDF of this page for easy reference.

Enjoy!


Worth the Effort or Waste of Time?


Let's start with the benefits of pumpkin....
  • AIDS VISION; a cup of cooked, mashed pumpkin contains more than 200% of the recommended daily of Vitamin A, carotenoids and beta-carotene.
  • LOW CALORIE; 3 grams per cup of pumpkin is only 49 fiber rich calories.
  • REDUCED CHOLESTEROL; Pumpkin Seeds are naturally rich in phytosterols which may help reduce LDL levels and tryptophan which has shown to improve moods.
  • REFUEL A TIRED BODY; one cup of cooked pumpkin has up to 564 milligrams of potassium.
  • VITAMIN C; upwards of 11 milligrams can be found in one cup of cooked pumpkin.


Benefits of Pumpkin

Wouldn't you agree that it IS worth the effort and time commitment?  I would.  Yes, you can buy a can of it at the store, even get the organic, I have.  However, if I have the opportunity and time to make my own, I always take that option.  I'd prefer the only processing of my puree to be my Kitchen stove and a glass jar and not a commercial processing facility.

Ok, enough of that, on to making your own puree:

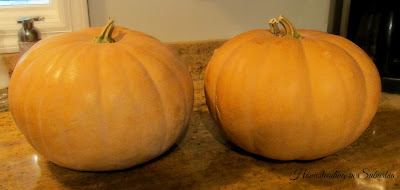
You can use any pumpkin but I prefer "milk pumpkins" or also known as "sugar pumpkins".
They are lighter in color than what you normally see.

Give them a good scrubbing.

Cut open the pumpkin and scoop out the innards.
You can either compost or save the seeds and roast them.

Slice into chunks that will fit into your pot, cover with water and boil until soft.  Depending on how big your pumpkin is and how much fits in the pot, it can take up to 30 minutes or longer to soften.


Remove sections from the pot, BE CAREFUL, the pieces will be very hot, let them cool a few minutes.  Use a spoon to scrape the pulp from the skin (the skin goes in the compost too). 

This is the undrained pulp from one large pumpkin.

Using a colander, let the pulp drain until most of your water is out and give it a stir every now and then. This takes quite a while, up to 2 hours in most cases.

This is what drained from one of my pumpkins, nearly 7 cups of water!
As you can see, draining the pulp is important.

You're done!  It's probably taken all day BUT well worth the effort in my book.
What I see here is 9 pumpkin pies to be made any time I want!


A few tips:

I normally do this on a weekend.  I'll get everything cut up, boiled and draining started then go about my day, passing by every so often to give it a stir.

Any pumpkin works but Sugar Pumpkins have a nice taste which I prefer for recipes.

If you like your pies a little rustic like me, there's no need to do anything further after draining. If you like it smoother use either a potato masher, blender or immersion blender to achieve the desired consistency.

I use a mesh strainer and cheesecloth only because I find it easier to clean up.  Any small-holed strainer will do.

Store puree in the freezer in freezer-safe jars, BPA-free plastic containers or Ziploc Bags, removing as much air as possible.  I prefer the glass jars since they are reusable and easy to clean. When you're ready to defrost, put it back into a collander while you prepare your recipe.  A little more water will drain from being frozen.

You CANNOT safely can pumpkin puree either with a Pressure Canner or Water Bath Canning.  There is no safe way, other than freezing, for long term storage.

You CAN Pressure Can pumpkin chunks.

You can find my favorite Pumpkin Pie recipe here.  I've been making the same recipe for over 20 years and it's perfect every time.


If I were to buy 9 fresh pumpkin pies at a bakery, it would cost me $20 per pie.  Yep, 20 bucks!   

The pumpkin cost me $6 so that's 67 CENTS per pie plus another $2 for ingredients.  Total $2.67 for homemade, nutrient-rich pumpkin pie.

To me that's worth the effort.  Wondering if it's worth your time and effort?


Try it.  Compare a pie made with your fresh puree and another with canned.  I promise you'll be shocked at the taste.  And if not, well, you learned something new, you have a few jars of puree and a good story to tell.


Don't just carve your pumpkins . . . Eat them!

https://www.pinterest.com/homesteadingins/healthy-pumpkin-recipes/
Pumpkin is one of my favorites and recipes that include fresh pumpkin are even better.  You can easily substitue fresh pumpkin for canned.  If you need to use canned, be sure you're getting JUST pumpkin with nothing added.  Using canned pumpkin with additives such as sugar, will change the taste of your recipe quite a bit.

Pumpkin Butter, like Apple Butter, is tops in our house.  We use it every day for PB&J sandwiches; that's Pumpkin Butter & Jelly!  Check out Oh She Glows simple recipe.

Pumpkin Pancakes, oh yeah, they're perfect for Breakfast, Lunch or Dinner in my book.  Mom, What's for Dinner recipe is flavorful and delicious.  If you don't have Buttermilk on hand, don't worry, Emeril's recipe is super simple to make and I use it all the time.

Pumpkin Turkey Chili sounded, well if I'm going to be honest, not so good.  I made this two weeks ago and I will attest to it's deliciousness.  Honestly, you really can't taste the pumpkin but you reap all the healthy benefits of it being in the recipe.

Pumpkin Risotto, put together in about 15 minutes, is the perfect compliment to the Chili. Southern Inlaw has an easy to follow recipe I think you'll really enjoy.

Pumpkin Pie finishes the meal with perfection.  Once you find your favorite, you won't stray, this is mine...
Click to Enlarge
Making fresh Pumpkin Puree is best from sugar pumpkins (or "milk" pumpkins as we call them here in Northern New Jersey).  They tend to be small, about the size of a smooshed medium watermelon and a light, creamy orange.  It's well worth the effort and typically you can get 2 or 3 pies from 1 pumpkin.

There are plenty of sites with instructions for making pumpkin puree; these are mine;  Scrub the whole sugar pumpkin before cutting, then cut into large slices.  Discard the stem. Bring a large pot to boil and cook until the rinds are soft.  Carefully remove the slices from the water, scrape off the pumpkin, discard the rind (be sure to compost it), and drain the pulp for an hour or so. Draining depends on how much you have.  You don't want to be able to squeeze out any water. It doesn't have to be bone dry, just as dry as you can get it. You're now ready to use the pulp in any recipe that calls for fresh or canned pumpkin.

https://www.pinterest.com/homesteadingins/healthy-pumpkin-recipes/
If you love pumpkin as much as we do, check out our Pinterest Board, Healthy Pumpkin Recipes to find your favorite.

You might also enjoy our Apple Harvest board with over 650 pins of great Breakfast, Lunch and Dinner recipes, along with some adult crafts.  Let's face it, why should the kids have all the fun!


Wondering if all this is worth the trouble?  The answer is an emphatic YES!  The health benefits of pumpkin are quite amazing. Vitamin A, Fiber, Amino Acids and Potassium to name a few.  It's also easily available at most grocery stores, however, if you have the opportunity to make your own fresh puree, go for it, you won't be disappointed.

Apples: The Good, The Bad, and The Ugly

Apples

The Good, The Bad and The Ugly, that describes our apple trees.  We don't treat the trees with any kind of chemical sprays, or even organic sprays; we let nature decide.  The outcome?  Many are Good, meaning no bruises, spots, pest issues.  Some are Bad, meaning those are picked and put in the woods for the many animals that frequent our yard.  And there's the Ugly.  Some are ugly and edible, others are ugly and put out back.  This year, our 3rd year living here, happened to produce mostly Good and we couldn't be happier.

Apples: The Good, The Bad, and the Ugly

My usual course of action this time of year is to make applesauce and freeze it.  However, since we now have our own apple trees and a bounty of fresh apples, I felt it was high time I learned canning. Off I went to Pinterest and found more than enough recipes to get started, too many actually which is why I wound up making a Pinterest Board dedicated to apples.

I started with Food.com's Best Apple Pie Jam recipe.  It seemed simple enough and it was, we turned out about a dozen jars.  For the novice canner like myself, I highly recommend this one.  It also happens to taste delicious. The only change I made was instead of packed brown sugar, I use Sucanat. I've been using it in place of commercial brown sugar for years as a healthier option.

Sucanat

My next day included Canning Apple Pie Filling from Little House Living.  I found it fairly easy to follow and wound up making 5 Quarts plus 8-1/2 pints for holiday gifts.  Win-win!

Apples: The Good, The Bad, and the Ugly

After the Apple Pie Filling, I decided to try Homemade Pancake Syrup from the apple peelings. Since I'm not one to waste anything, this sounded like a great idea.  Let me just say, this would be better suited to a more experienced canner.  I read the directions carefully, however, one key factor was missing; the proper time for boiling.

After my failed attempt, I decided to read thru ALL the reader comments and found that I was supposed to boil the liquid for just a minute or two.  Since this important fact was left out of the directions, and I didn't know any better, I boiled the liquid for over 30 minutes.  If I had to be honest, I'd say it was probably 45!  Needless to say, it went downhill from there.

To make a long story short, I boiled over the liquid onto my ceramic top electric oven.  Not pretty, and not pretty to clean up either.  The outcome? Candy Apple Topping.  We grabbed a few Good Apples, literally wiped on the topping, and enjoyed a treat for the afternoon.

Apples: The Good, The Bad, and the Ugly

My last attempt, using additional leftover apple peelings was Apple Scrap Jelly from Fireflies & Mudpies. I'm happy to say, this was a huge success.  We did 9-1/2 pint jars for holiday gifts and will continue to make this throughout the season.  Note:  This recipe calls for 9 cups of sugar, I reduced that to 6 cups and it was wonderful and not too sweet.

Apples: The Good, The Bad, and the Ugly

All in all, canning has been a good experience and considering we have several more bushels to pick, we'll be in the Kitchen for the next couple of weeks.

Apples: The Good, The Bad, and the Ugly

Need ideas for your apples?  Check out our APPLE HARVEST Pinterest Board.
Over 600 pins for Breakfast, Lunch, Dinner and (adult) Crafts.

Also, be sure to sign up for email updates and receive our mini-eBook
Canning Made Easy.


Resources
RESOURCES

Our Pinterest Canning Board here
Our Apple Harvest Board here

Test jars for proper sealing here
Troubleshooting here

Questions about Water Bath Canning here

Questions about Pressure Canning here

Adjust for high altitudes here

National Center for Home Food Prep here


Thoughts from a newbie canner:
  1. It looks like alot in the pot, but it's not.
  2. I ran back to the store 3 times for jars.  Stock up ahead of time.
  3. Get the all the canning supplies recommended.  You'll use them all.  
  4. Always check the reader comments, it typically holds valuable information the writer omitted.
  5. If YOU are posting a recipe, read, read, read and read it again.  Make sure you have ALL necessary and pertinent information included.  Canning really is easy if you have the proper directions. 

It's Official . . . We're parents!

We are Official Chicken Parents


Well, chicken parents that is!  When we moved back home to New Jersey after 9 years in the Shenandoah Valley of Virginia, we were fortunate to find the perfect home (for us)!  The house had been vacant for about a year and the back yard almost completely overgrown.  Nevertheless, we could see potential for many great things.

The very back of the yard was so completely overgrown that we had no idea there was another shed hidden in the weeds (yes, the weeds were THAT high!) and two very large enclosures just below it. Picture 4' high chain link fence doubled up (making it 8' high), black fabric covering that 8 feet and supports against the outside perimeter of the fence.  There were two enclosures like this.  After more investigation, and talking with the neighbors, we discovered the previous owner's had raised animals on the property for over a decade.  We could then see why such extreme measures were taken to protect the animals from bear, coyote, turkey and fox which freely roam the area.  Unfortunately, it had been several years between their eliminating animals from the property, the year the property spent vacant and our coming along.  To say the fencing and shed were in disrepair would be an understatement, but again, there was potential!

Building the chicken coop
This is a recent picture of the 'hidden' shed, before renovation began.


The second fenced area couldn't be saved so that was removed, the remaining area will be used for a large garden that we hope to have next season.  For now, we put in a small garden near the house.

Expanding the garden
10x20 Garden
All that said, we immediately wanted to raise our own chickens now that we had the room.  That was 3 years ago.  You know the feeling, you have a great idea and basically know how to implement it. Then life sets in.  New job, new schools, family, chores. That left basically half of Saturday and all day Sunday for Barry and I to work around the property together.  Not to mention, we were so happy to be back home with family, we spent most of the first year visiting as much as possible.

Little by little we hacked away the weeds and scrap trees to reveal a large shed with 4 rooms. This would be great storage AND provide a place for chickens.  I really do wish there were pictures, you wouldn't believe the growth!

We were able to salvage the existing shed by reinforcing some walls and installing new flooring, all done with leftover wood.  The room on the end is small, about 4x12, perfect for nesting boxes and perches.  The boxes extend into the adjoining room for easy access without entering the coop.

Chicken Nesting Boxes
Nesting Boxes
Barry's next plan was to build an enclosed outdoor area where they would be protected from predators. This took nearly 3 months to complete. Remember, we only have a day and a half available each week to work on the project.  Figure in rainy days and other obligations and the time just flies.

Building a Chicken Coop
Teaching Colin how to use the drill
Building a Chicken Coop
That doorway leads to the nesting boxes
Building a Chicken Coop
He's got it!

Next came the walls, roof and floor.  The flooring is thick bluestone tiles left here by the previous owners. We purchased metal sheet roofing from Lowe's.


Building a Chicken Coop
Nearing the finish line

It's Official, We're Parents
Building a Chicken Coop
Left behind Bluestone tiles make the perfect floor

Building a Chicken Coop
Installing a metal roof - this was the easiest project

Building a Chicken Coop
Construction Complete!
All that was left to do was painting, a 2-day project that Tyler, our youngest, and I completed. Even Macy kept us company.

Building a Chicken Coop
Painting complete!

Building a Chicken Coop
Macy learned quickly not to step in the paint (again!)

We're fortunate to have quite a number of farms in the surrounding area, so finding chickens was easy.  Off we went, about 30 minutes down the road, to meet our new family members, it was pick up day at Brodhecker's Farm!

Picking Out Chickens for our Coop
The boys deciding which ones they wanted


Picking out chickens for our coop
Okay, that's ALOT of chickens!

Bringing the Chickens Home
Yep, he's carrying all 6 in one hand.

The Chickens are home
Oscar and Macy were also quite excited


Getting a closer look

It's been about a month now since that day.  The girls, now approaching 20 weeks, should start laying within the next month or so.  Or at least that's what we're hoping.

Chickens checking out the nesting boxes
Happy Girls

Morning in the Chicken Coop
We put an old fence inside the coop.  This allows the girls to
look outside whenever they want - usually there's at least 4 at a time on it


A few side notes to our story...

We read and read as much as we could about birds, care, coops, food.  You name it, we researched, read and pinned it all! You might also enjoy our Pinterest Board, All Things Chickens.

Our next project on the coop will be to give the girls a fenced area outside to forage.  We learned through reading and friends the best course of action would be to wait until they are regularly laying in their nesting boxes before expanding their territory.  This should ensure all eggs are laid in the boxes and not in random places outside.  Sounds good to me.

Building a Chicken Coop
There will be a 10x20 fenced outdoor area for the girls.
A small door will be put in the side wall here for access.
Now we anxiously await fresh eggs!

UPDATE!!  Just 2 days after posting, we got our first egg!!  Gee, perhaps I should have posted this sooner!

Our First Egg